
Let's eat dessert first:
The Giant Metal Baby has been awarded a grant!!! Richmond Cultureworks Grant Program is a marvelous resource for independent artists and 501(c)3 organizations that need a little boost for a special project.

I applied in March, and though some things have changed since I turned in my application essay, I'd like to share part of what I wrote. I think it's the most clear, emphatic, and enthusiastic statement I've made to date about what I'm trying to do here. You can read it by clicking the button to the left <<<
A big part of my mission outlined in the grant is to enthusiastically share this process. To that end, I'm happy to announce that I'll be presenting the Giant Metal Baby at RVA Creative Marketplace this Wednesday, July 13th! If you know of any where that you think would benefit from a show-and-tell about 1) a self-supporting and self-employed young woman with 2) a project-based career who has 3) a creative approach to a unique challenge which demonstrates 4) small-spaces possibilities in an urban location..... ~let me know~
Now, on to all the stuff I've been up to since the end of May whence I last touched this blog....
Well, it took every inch of June, but I have the beginnings of walls :) The framing is all in, with the first layer of insulation as well. The ceiling rafters are also up along with its first section of insulation. The framing is screwed onto the aluminum from the outside with a little silicone caulk in there to fight Water: The Enemy. No glue, but I feel okay about that. The rafters are there to be an attachment point for the ceiling sheathing, which in turn will hold up the insulation stuffed in between. Still don't know what I want that ceiling sheathing to be.
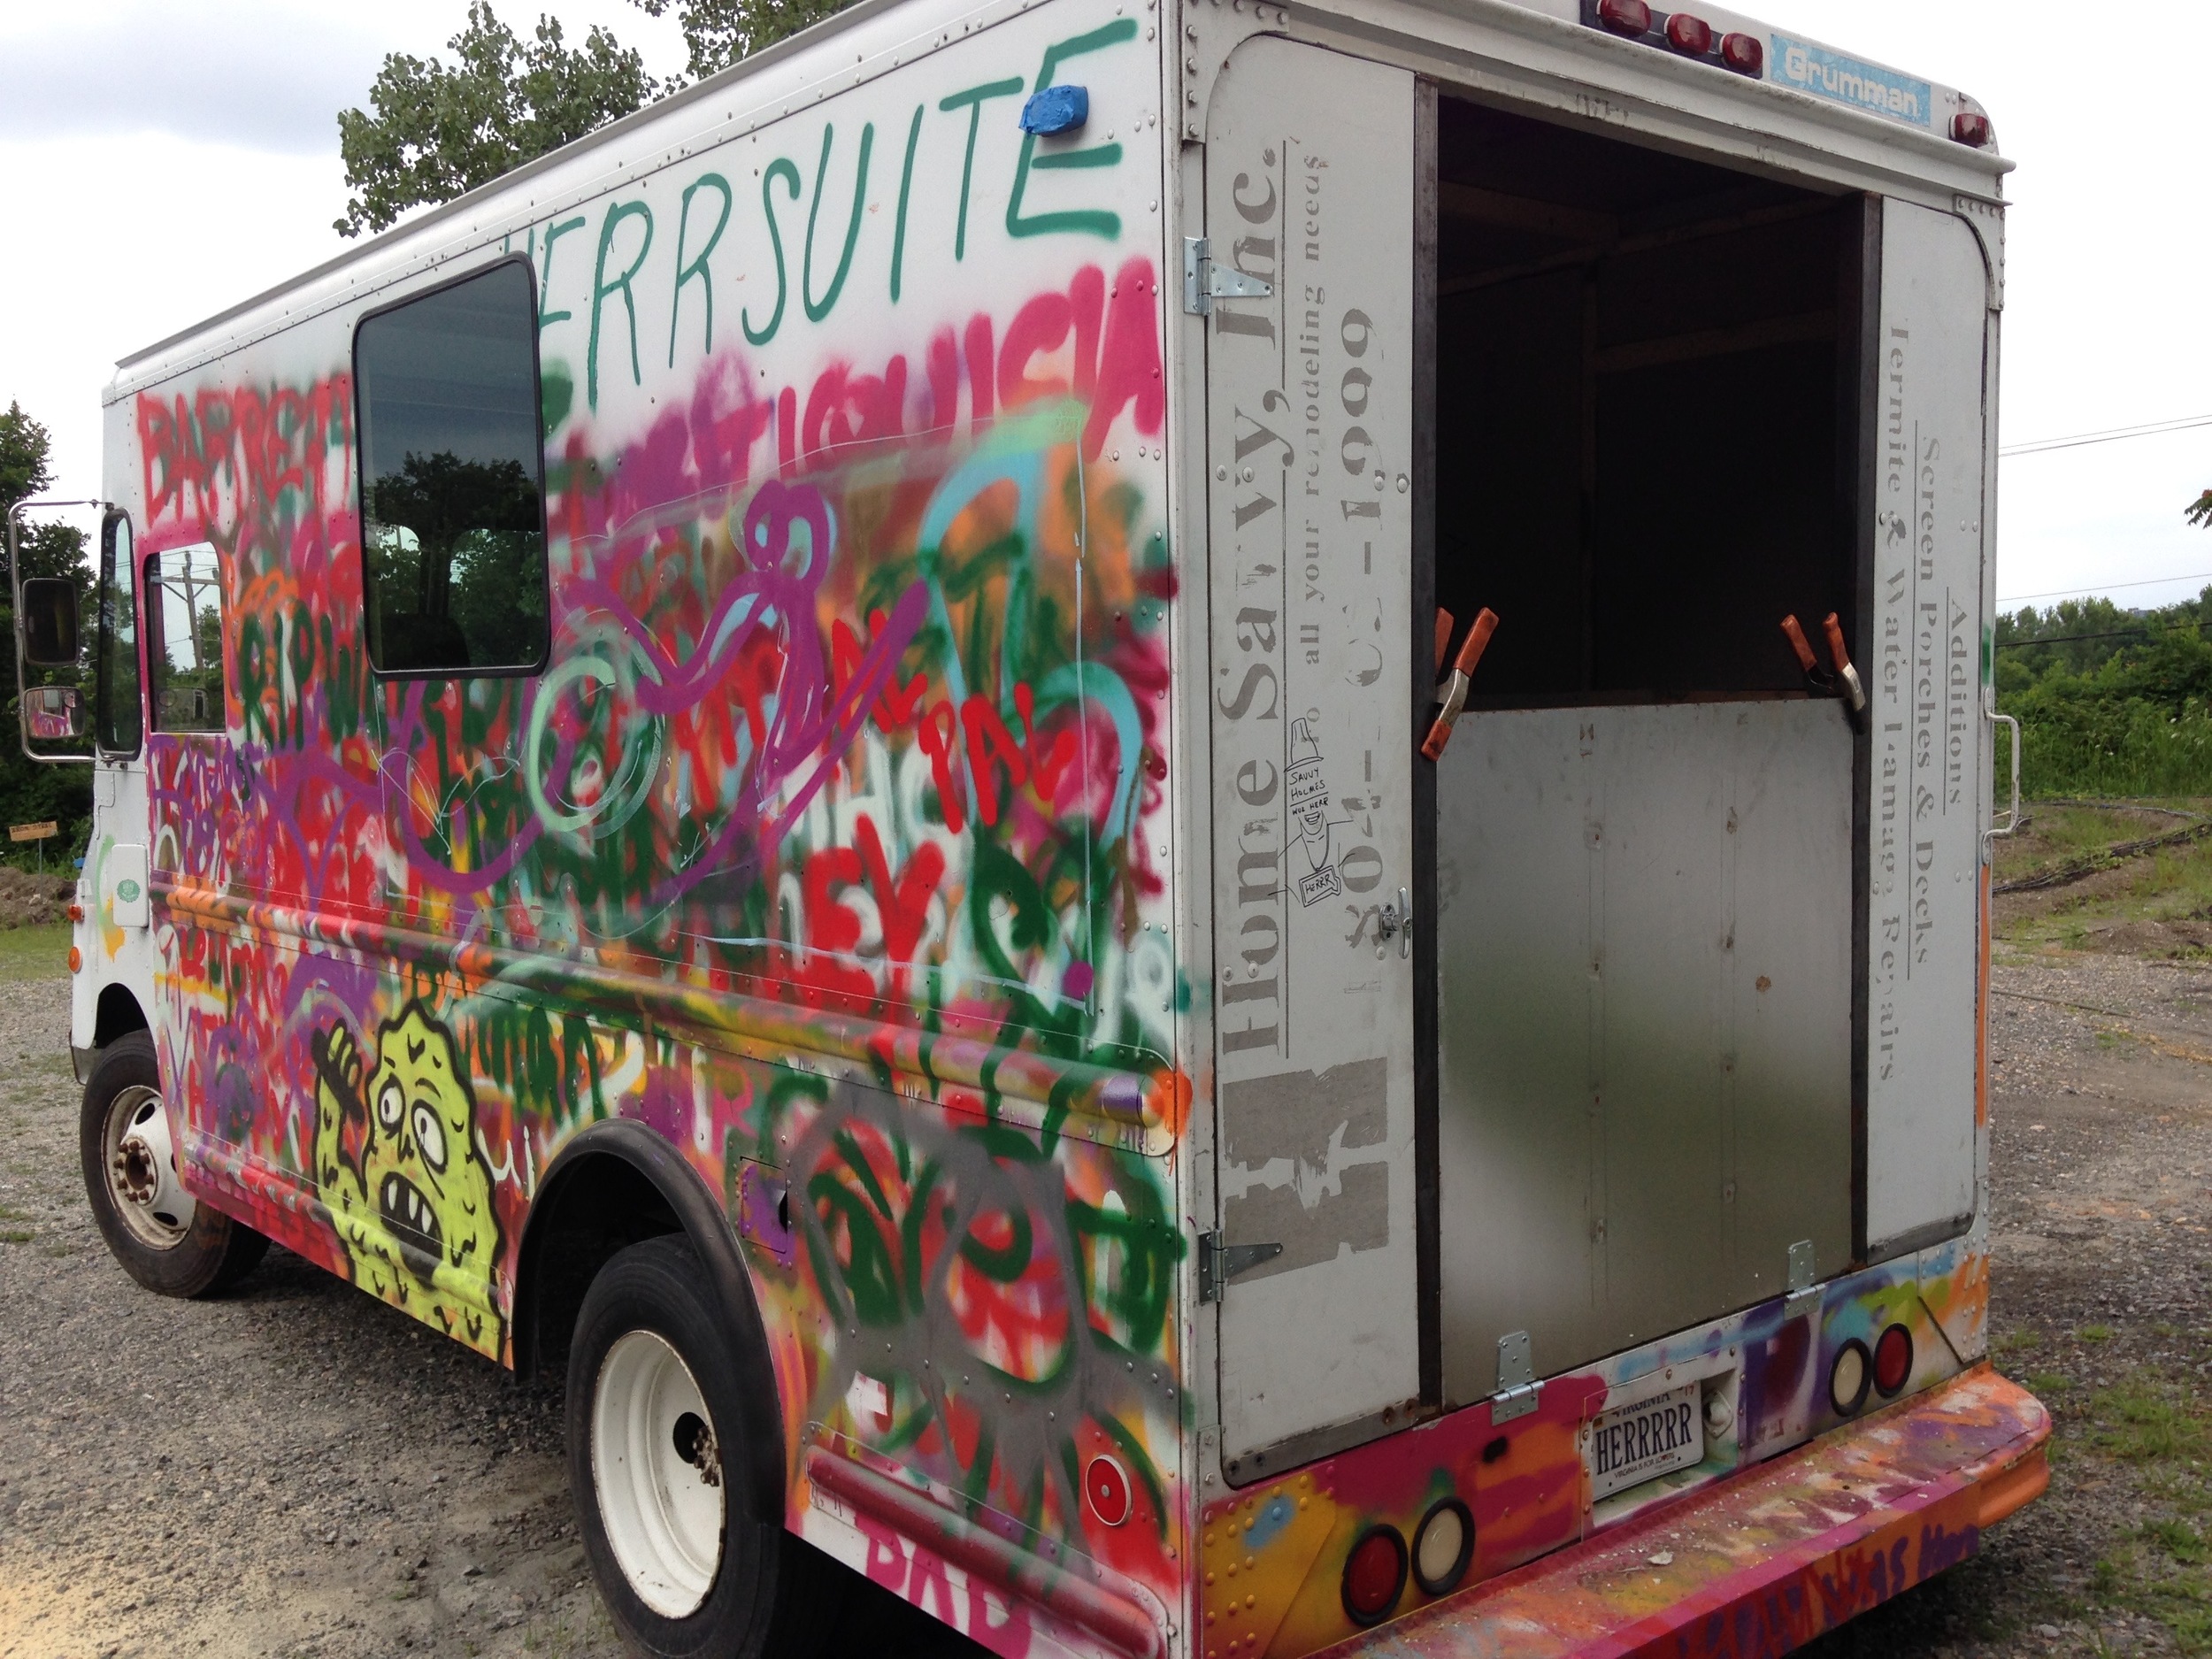
Some friendly neighborhood graffiteers added just a little more paint before we started covering the walls. They also left a whole bin of spray paint?? I ain't mad. Last glimpse of the inside pre-walls:
You can see the spray paint bin in the front of the truck here...
Thom Stanton continues to be my building coach. Huge kudos to him for being very patient and instructive, where it would be much easier for him to just grab the drill and do it himself.
We cut each piece for the framing inside the truck, assembling it loosely against the wall, then took the whole mess outside to screw it together after marking on each piece where they should be attached to each other. This worked well for the most part - the frame slipped easily through the door opening - but we missed one or two measurements around the window by a skosh. Not bad, we just had to make a skinny shim on one side and a take a chunk out of the other.
This whole process was based roughly on my SketchUp model (see previous post), but of course with oodles of adjustments as we went. Thom had a lot of helpful changes to make in order to accommodate my future furniture and make sure it's fixed securely in place. This is one reason this project is so hard to get advice on: everything is going to move eventually. It's custom from top to bottom, so conventional building often doesn't have the right answers (16" on center? naw), and RV solutions are... well, they're for RVs made in a factory. For example, building framing after the 'walls' already exist wouldn't make sense in any other situation.
Scheming-on-the-spot for how best to accommodate my sliding shelves.
Once the framing was all attached to itself and resting in place, we used some of that donated spray-paint to make an outline of their placement. This gave us a path for where to drill pilot holes through the aluminum, after which it was a quick job of applying a dab of silicone caulk from the outside and shooting screws through the aluminum and into the wood. After wrestling with twisty wood and weird angles and "close-enough" measurements, the wood really didn't sit nicely against the wall by any stretch of the imagination. BUT! Once we started shooting screws in, they pulled the wood tight-tight-tight against the metal, correcting almost all of those problems. It was SO SO SOOO satisfying.
I can't believe I didn't take pictures of any of that process. Sorry.
Next, insulation. After doing a whole bunch of research on what kind of insulation to buy (polyiso!) it turns out that I have no idea where to buy the stuff. Lowe's has like four sheets of four different thicknesses and that's it. Huge letdown. Usually people don't buy just a little bit of insulation I guess - more a bulk contractor order item I suppose. I started calling some of the contractor folk I know (turns out there are several) to ask where I should shop besides Lowes.... and I hit the jackpot. Friendbro donated nearly all of the insulation that I need! I think it was all spare from another project or something? Some was certainly not new judging by smell, butttt it was intact, and quite free. Excellent.
Once again, lots of custom measurements and cuts, but it went a lot faster than the framing. 1" thick sheets went between the 1.5" deep studs, which will leave an air gap of .5". Then I'll have sheet of .5" on top of the studs, then plywood sheathing.
We stopped before starting the .5". I wanted to catch up recording the actual measurements of the finished framing on my SketchUp model, and I really need to get some spray foam in all the little gaps left over. Instead, we cut the ceiling joists and shoved one section's worth of insulation up there. You can see in the picture below that the paint pole is holding those sheets up because... we forgot to put glue in there. Not a huge deal, glue just would've held it up more tightly until we put sheathing on.
You can see the black from the outlining spray paint on the wood, and the little shim around the window. I'll wrap a thin aluminum strip along the gasket of the window, resting against the wood, so that I have a leetle tiny windowsill with curved edges :3 The back section on the left is where my scaffolding closet is, so it needs space more than it needs insulation.
Now I need to buy (beg?) more insulation to finish the ceiling, and buy sheathing for the walls. My SketchUp model helped me determine how much of each material I will need, and what cuts to make. I'm considering a diagonal floor just for coolness factor - it doesn't use any additional sheets of material, and I think it'll make space feel better.
color-coded for driver / passenger / back / floor
purple is the floor, the rest is walls
Also
The other big thing is that I have (most of) a back door now! Ruben of B&C Creations is fabricating most of it out of steel (a little beyond my DIY scope), and we decided to salvage part of the van's old garage-style door to make the side panels for it.


As of now, I believe all parts of the backdoor are fabricated but not installed yet. Once it's done I'll show off the whole thing and explain it. For now, check out this video Ruben took of me working the ramp! (It's really heavy)
Other random stuff I've done:
- Bondo'd the many holes in the walls left over from taking out the e-track and other junk
- had the steering column replaced (almost $1000 - ouch)
- taken apart the windshield wipers to make them not jump over the window gasket - now they need a $50 part >:(
- updated the whole sketchup model to reflect reality
Next Steps
- buy 1" ceiling insulation, cut and install (with glue this time)
- buy ceiling material, cut and install (glue and screw)
- spray foam insulation into all the cracks, cut and place .5" sheets of wall insulation
- buy wall material, cut and install with .5" insulation (glue and screw)
- cut floor insulation (I decided against framing the floor, at least to the extent that I modeled it - no point, it seems) and place it (glue!)
How's morale?
Getting the grant is both hugely validating and a painful reality check. Reading back over my application, I sound very confident in a timeline that simply hasn't been even remotely feasible. I distinctly remember writing it, and thinking that I had spaced things out very reasonably, even adding a spare month just in case.
Time and time again I am taught by my projects that everything takes longer than I expect, and it just doesn't stop being true. According to that application, I'm abysmally behind. BUT I know I've been working as hard as I can for the whole time, and I couldn't expect anything more of myself. I know it's a matter of lowering my unrealistic expectations, and maybe making less promises about time. I'm very happy with the state of the van as it is, and I look forward to all the next steps. Even though I feel nightmarishly behind, I don't feel particularly discouraged. No intention of giving up or cutting (big) corners has crossed my mind. So at this point, I'm just gonna keep on keepin on.
The only real wrench that this behind-ness will cause in my life is that I don't have a studio, and I'm still in the warehouse. I had hoped that I'd be studio-less for a few months, which is no big deal, and moving into the van as soon as possible. July makes 7 months at the warehouse. I'm on the brink of a 3-week trip (Seattle, Victoria, Calgary, Banff, Jasper, Maryland, oh my!), and I need to make some real decisions about whether I will stay in the warehouse (a stressful environment, but with a lot of handy resources), move to another worksite, or pack everything into the truck somehow and work on it at my house. My lease is up just about a week after I return from the trip...